The Essentials of Knitted Lace
![]() Easy lace scarf pattern
Easy lace scarf pattern
![]() Links to lace patterns, tutorials, books, and yarns
Links to lace patterns, tutorials, books, and yarns
Many people consider knitting too three-dimensional to produce the traditionally fine, flat, and fluid fabric of lace. While this is somewhat true, the same innate depth and texture of knitted fabrics can be manipulated to produce beautiful lace effects.
Finished knitted lace may look brain-staggeringly complex. But lace is essentially composed of two simple elements: increases and decreases.
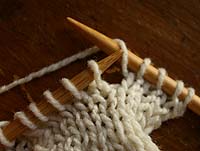
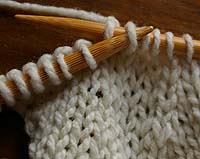
The Standard Increase: YO
By not connecting with stitches from the previous row, yarn-overs produce the large, open holes in your fabric that are essential for the open, airy look of lace. For this same reason, yarn-overs are often used sparingly and only for effect in non-lace patterns.
Decreases
Unless you're trying to create a progressively wider piece of fabric, you'll want to balance out all those increases with a reduction in stitches elsewhere in the row. Here's where the second element of lace knitting comes in: the decrease.
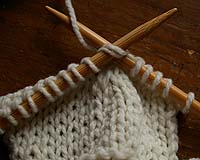
Right-Slanting Decrease: The K2Tog
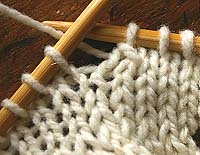
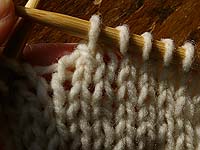
The first decrease most knitters learn is simply knitting two stitches together, or K2tog (shown at left).
This produces one stitch that tilts to the right. The same is true if you work the decrease on a purl row, or P2tog.
Left-Slanting Decrease: The PSSO
If you're working any type of garment that needs parallel decreases tilting in opposite directions—such as working the toe decreases in a sock—you'll want to pair the K2togs on one side with another type of decrease that will cause the stitches to slant in the opposite direction, or left.
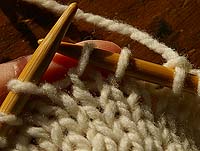
The most common way to create left-tilting decreases is to slip one stitch to your right needle without working it, knit the next stitch, and then with your left needle lift the unworked stitch over the one you just knit, letting it drop off the needle.
You'll see this written as psso, or pso, with whatever slip and knit combination noted beforehand. For example, s1k1psso would mean slip one stitch, knit one stitch, and then pass the slipped stitch over the knit stitch and off the right needle. But you'll also see larger decreases like s1k2togpsso.
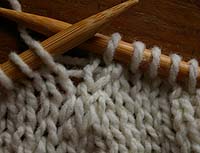
Here's the slipped stitch in action.
Slip one stitch to the right needle. Many knitters feel that the best way to slip this stitch is knitwise as if you were going to knit it. This will position it so that, when slipped, it has a subtle twist that more closely matches the standard K2tog look. (Ultimately, I'd say do what you like best.) Then knit the next stitch as you would normally.Select the slipped stitch with your left needle and...
...lift it over the knitted stitch and off the needle. See how it tilts to the left?
Left-Slanting Decrease: The SSK
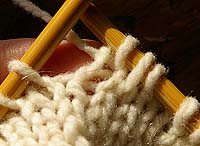
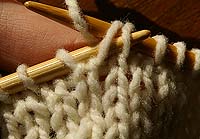
Recently designers have favored another type of left-slanted decrease called the SSK, or slip-slip-knit.
Then slip the tip of your left needle, left to right, behind the fronts of those two stitches, keeping the tip of the left needle towards you. Take your yarn and wrap it around the working needle to make a stitch.
Pull that loop through the two slipped stitches and let them slip off the needle. Again, see how the stitches tilt to the left?
Slipping Knitwise or Purlwise?
The real goal is to produce a left-slanting decrease that matches the right-slanting decrease most closely. If you'd like to see a fuller description of the different increases and decreases and how each matches the other, check out this clear tutorial at KnittingHelp.com.
The Art of Placement
The soul of knitted lace lies in the relationship between your increases and decreases. The possibilities are surprisingly infinite.
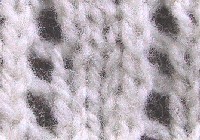
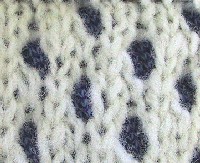
The type of decrease you use (the right-pointing K2Tog or left-pointing SKPSSO) and the location of the decrease in relation to the increase (both within individual rows and the entire fabric) will produce dramatically varied results. Designers essentially use the diagonal lines of decreases and circles of YOs to draw patterns in the knitted fabric.
The more you experiment with different patterns, the clearer this will become. For now, let's get you started on a project that demonstrates how increases and decreases can create lacy patterns.
Beginner Project: Easy Lace Scarf
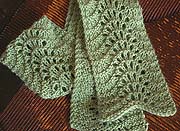
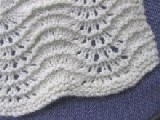
Perfect for beginners, this stitch—called "Feather and Fan" or "Old Shale"—will familiarize you with the basic dance of increases and decreases in lace, producing gorgeous effects that knit up quickly and easily. This stitch achieves its wavy, puckered effect by grouping all the decreases together, and then following them with a series of increases.
Feather and Fan looks particularly dramatic with finer, lace-weight yarns, but you can use a heavier yarn (such as DK) without losing too much of the intended effect.
Materials
Choose a yarn that will wear comfortably against your bare neck. I used Classic Elite Lush, a smooth four-ply blend of angora and wool that knits up at 4.5 sts per inch on US 8 needles. One 123-yard skein will produce the scarf you see here, which measures 4 x 45 inches.
The yarn's recommended needle size is US 8, but I wanted the stitches to have plenty of room so I bumped my needle size up to US 9. Fortunately you don't need to be too obsessed with gauge since this will only wrap around your neck.
Cast on 22 stitches and knit 2 rows.
Now you're ready to begin the lace pattern, which is as follows.
Row 1: (RS): K all sts.
Row 2: K2, p18, k2. (Those 2 border stitches on either end will always be knit in garter stitch—their role is to keep your fabric from curling.)
Row 3: K2, (K2Tog) 3 times, (YO,K1) 6 times, (K2Tog) 3 times, k2.
Row 4: K all sts.
Repeat rows 1 through 4 until you've reached your desired scarf length or run out of yarn, whichever comes first. End by completing Row 4, and then knit 1 more row and bind off all sts.
Finishing: Darn in any ends and fill a sink with lukewarm water and add a gentle detergent (such as Eucalan or Soak). Drop your scarf into the water and gently squeeze it until the water has fully saturated the fibers. If using Eucalan or Soak, you can skip any rinse. Otherwise, gather the scarf together, lift it out of the sink, drain the water, re-fill it with lukewarm water, lower the scarf back in the water, and gently squeeze. Repeat this process until the rinse water runs clear. Then blot the scarf dry in a towel and lay it out to shape. If you're using a finer, lace-weight yarn you'll want to use pins to help open up the fabric to its desired shape.
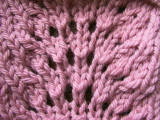
If you want to tackle this project in a finer gauge yarn such as Lorna's Laces Helen's Lace, by all means go for it. You'll just need to cast on any multiple of 18 stitches and add 4 stitches for the border.
Want More?
Some of our favorite patterns:
Stephanie Pearl-McPhee's Snowdrop Shawl
Polly Outhwaite's Kiri Shawl
Eunny Jang's Print O' The Wave Shawl
Laura Nelkin's Tourmaline Shawl
Nancy Bush's Estonian Lace Shawl
Laura Wallins' Twilight Lace
Michele Rose Orne's Cobweb Lace Stole
Folk Shawls
Lace Style: Traditional to Innovative, 21 Inspired Designs to Knit (Style series)
Victorian Lace Today
A Gathering of Lace
Videos:
Nancy Bush's Knitted Lace of Estonia
Ideal lace yarns we've reviewed:
Alchemy Haiku
Filatura di Crosa Nirvana and Superior
Hand Jive Knits Nature's Palette
Hand Maiden Sea Silk
Just Our Yarn Caravan
Koigu Painter's Palette Premium Merino
Land O Lace Loulou
Lorna's Laces Helen's Lace
Louet Mooi
Rowan Kidsilk Haze
Great needles for lace:
Addi Turbo Lace needles
Signature Needle Arts Circulars
Additional reading:
This is just the tip of the lace iceberg. If you're ready to dive into the deeper lace waters, head right over to Eunny Jang's encyclopedic online lace tutorial series. She begins with an introduction, then goes into yarns, needles, gauge, and charts; structure and movement of lace; and provisional and invisible cast-ons, hard cast-ons, and circular beginnings.
![]() Talk about lace knitting in our forums
Talk about lace knitting in our forums
This is a fully revised and expanded version of an article that first appeared here in July, 2002.


